MowFlow · Getting started
Your first day with MowFlow
Add a client, plan the visit, and keep a clear record when the work is done. Follow these five steps to get started.
Guide for the current web app and home-screen app.
Screenshots use example data. Your workspace and browser may look slightly different.
1. Add your first client
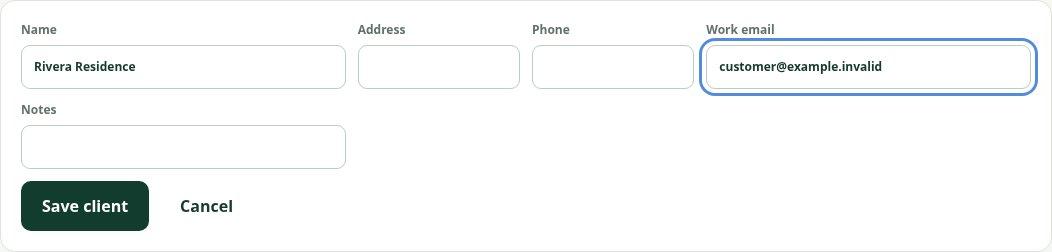
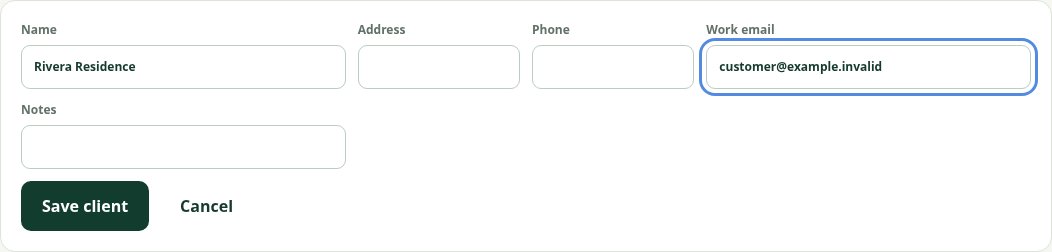
- Open Clients and select Add client.
- Enter the client’s name. Add the service address and a valid email address if you want to send them notices.
- Select Save client. You can return to the client’s page to update their details and notification preferences.
Use an email address the customer has provided for service communication.
2. Schedule a job
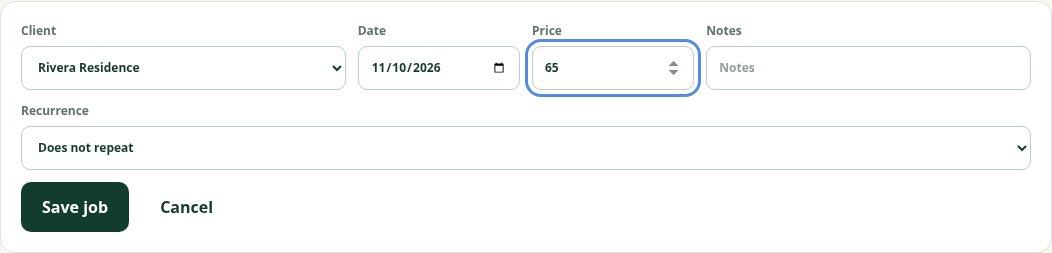
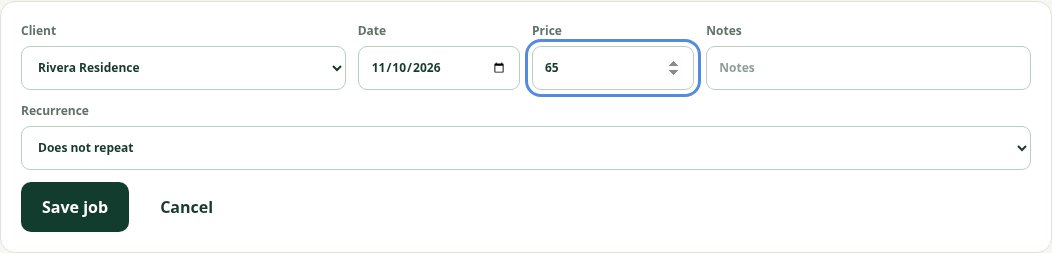
- Open Schedule and select Schedule job, or choose a date on the calendar.
- Choose the client and service date. Add a price and notes if needed.
- Select Save job. Find the visit in Schedule or Jobs. Recurring schedules require the Growth plan.
Jobs use a service date; MowFlow does not assume an appointment time.
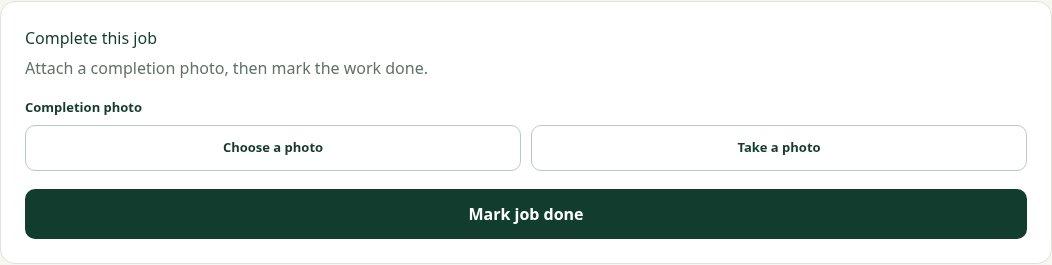
3. Complete the job and add a photo
- Open Jobs and select the visit you finished.
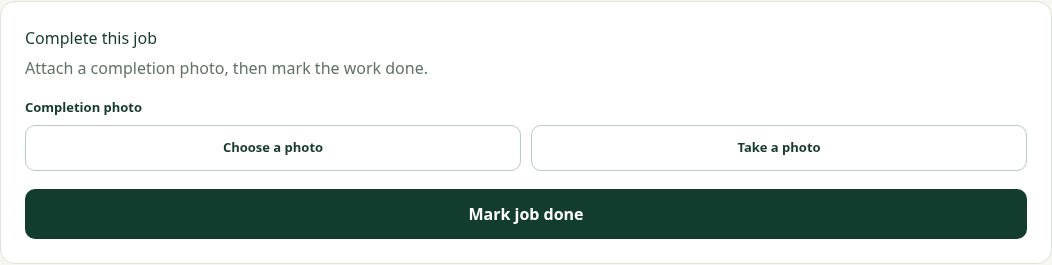
- Choose a saved photo or take a new one. Check the preview; Remove photo clears it before you finish.
- Select Mark job done to save the completion. When completion emails are enabled, the customer receives a private link to the details and available photo.
You need an internet connection to save work and upload photos. Completion-photo files can be up to 10 MB.
4. Set up customer emails
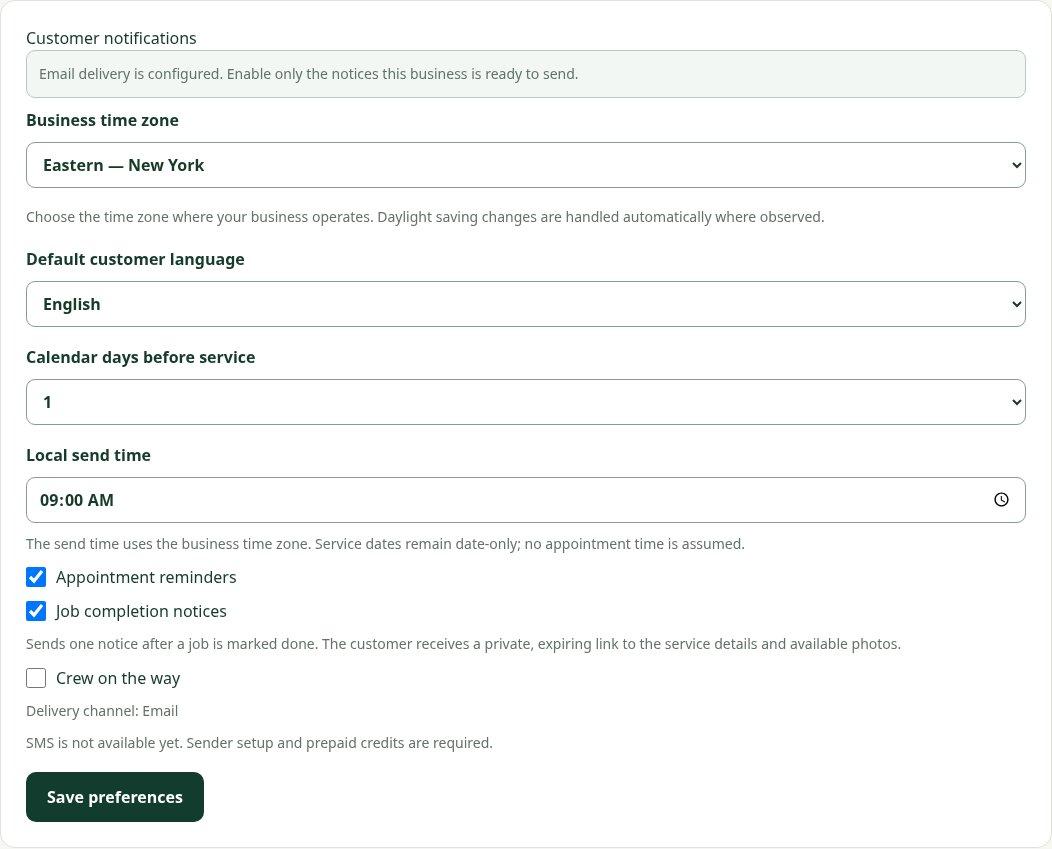
- Open Settings and find Customer notifications.
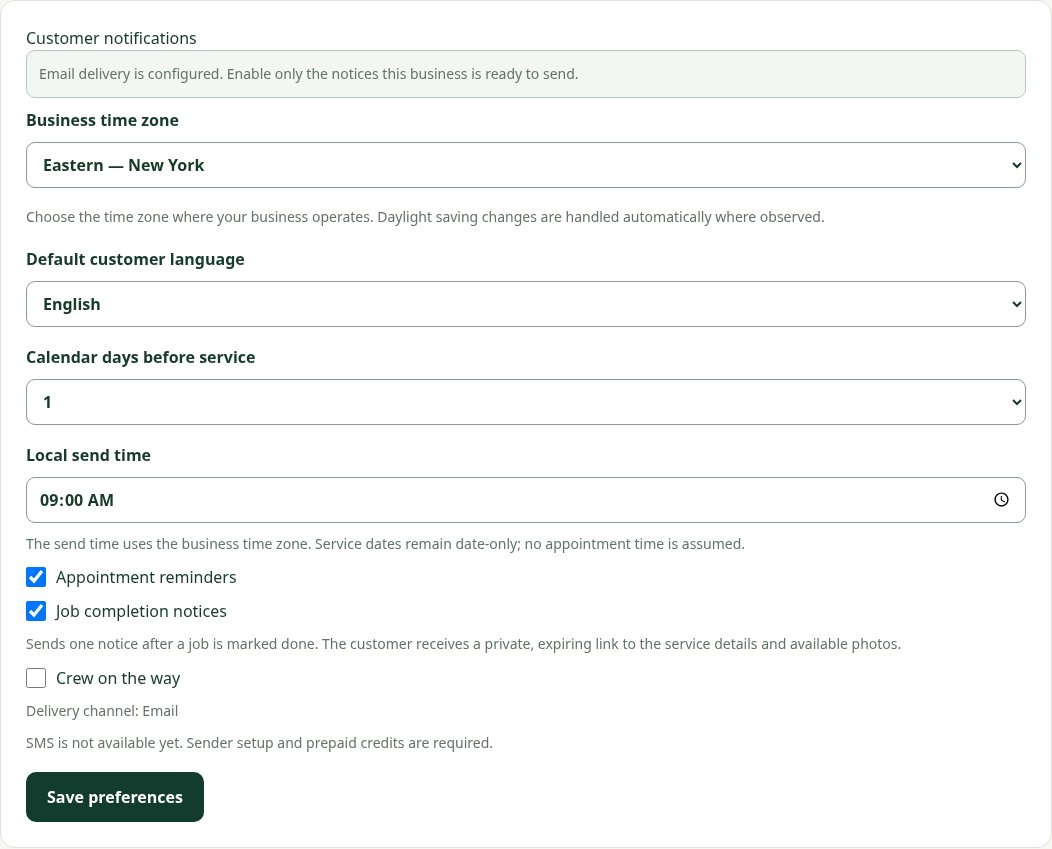
- Choose your Business time zone from the list. Set the default customer language, days before service and local send time.
- Enable Appointment reminders and Job completion notices, then select Save preferences. Check each client’s email address and notification preferences too.
Customer opt-outs override notice preferences. SMS is not available yet.
5. Add MowFlow to your home screen
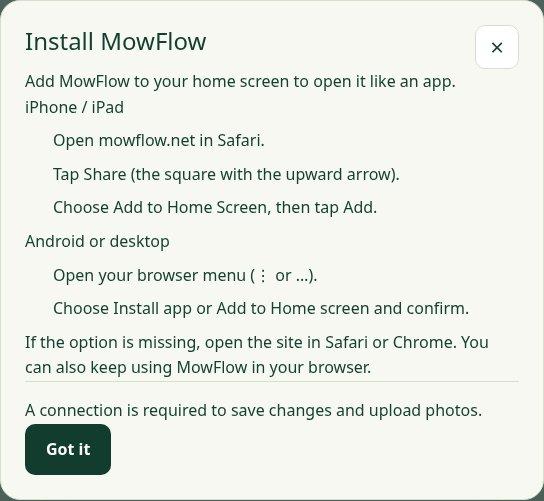
- iPhone or iPad: open mowflow.net in Safari, tap Share, then Add to Home Screen and Add.
- Android: open mowflow.net in Chrome, choose Install app or Add to Home screen from the menu, and confirm.
- You can also use Install MowFlow on the website. If your browser does not offer installation, continue using MowFlow in the browser.
The home-screen app uses the same account and workspace. An internet connection is required for saving changes and uploading photos.
Import an existing client list
- Owner: open Clients → Import CSV. Download the template and replace the example row with your client data. Export comma-separated UTF-8 CSV, up to 512 KiB and 500 records.
- Match Name and optional Address, Email, Phone and Private client notes columns. Request a preview and review every ready, duplicate or invalid record. No existing client is merged or overwritten.
- Select the ready clients you want, confirm you reviewed the selection, then import. Plan limits still apply. If the result is uncertain, retry the same import; request a fresh preview to change the selection.
- To update an existing client, open Clients, select their name and choose Edit client. Save changes or Cancel. Use a full service address, then review its route location again. Changing an email turns off client email notices until you review and enable them again.
- Imported email reminders and completion notices start disabled. Importing creates no jobs or emails and does not establish notification consent. Review each client before enabling messages.
Duplicate detection uses normalized name and address when present, otherwise name with email or phone, with name-only records requiring care. Shared email across different properties does not merge those properties. Correct the file or edit an existing client manually when needed.
Manage recurring service
- Open Schedule → Manage recurring services. Choose a client, first service date, a 1, 2, 3 or 4 week interval, optional end date, price, service instructions and default crew.
- Preview all prepared dates and resolve date collisions before confirming. New managed services prepare about 60 days of visits; production extends the window automatically. Each visit has its own status and completion photo.
- Use Change this visit only for a dispatch exception, or Change this and future visits for a reviewed series update. Completed, skipped, cancelled and past visits are preserved. An end date skips prepared scheduled work beyond that date without deleting history.
- Review any generation warning. A removed crew member, occupied date or unavailable plan stops generation for review. Older legacy recurrence records are not activated or inferred into a series; review them before creating replacements.
Reschedule a rainout
- Open Schedule → Reschedule for rain. Load the affected business-local date and select up to 100 scheduled visits. Completed work is excluded.
- Request replacement date options or choose a later date. Review known work minutes and budgets. Missing estimates or budgets mean capacity is uncertain; travel and breaks are not included.
- Preview every changed visit. Resolve occupied client dates, known overloads, days off, open visits and photo uploads. A linked recurring visit must stay before its next occurrence; moving selected visits does not shift the series.
- Optionally choose to email eligible clients using appointment-reminder preferences. Review and confirm once. Connection retries check the same batch without moving visits or queueing emails twice. New-date emails may take a few minutes and respect opt-outs and suppression.
Working with a crew
- Owner: open Team, or Settings → Manage crew. Enter the employee’s email address and select Send invitation.
- Employee: open the invitation email, sign in or create an account with the invited email, and confirm that email. Review the business name before accepting the invitation.
- Owner: open Team → Working hours to enter each person’s current weekday work budget in minutes. Blank means unknown; 0 means a day off. Configure your own owner budget too. These are work budgets, not shift start/end times.
- Owner: in Dispatch, enter Estimated work minutes on a scheduled visit and select Save visit. Estimates apply to that visit only. Review known planned work, missing estimates and work-budget warnings; travel and breaks are excluded. Completed estimates cannot be edited.
- Owner: open the scheduled job, choose an active crew member, and save the assignment. Service instructions on the job are visible to that employee.
- Employee: open Job updates to review assignments and date changes. Select Acknowledge update to confirm you have seen a current update. This does not complete the job. Choose email updates in My account.
- Owner: open the job to check whether the assigned employee has acknowledged the latest update. An email delivery status is not an acknowledgement.
- Employee: open an assigned job and select Open directions in Google Maps. Confirm the displayed service address before driving. If directions are unavailable, ask the owner to add or correct the address. MowFlow does not track your location in the background.
- Employee: open the assigned job and select Check in when you arrive. Including a one-time location is optional and off by default; if permission is denied, check-in still works without location. Select Check out when leaving. Neither action marks the job complete.
- Owner: review check-in status and recorded visit time on the job or Dispatch. End an abandoned open visit explicitly before moving or reassigning the work. Past service dates without a check-in are flagged; MowFlow does not assume an arrival time.
- Employee: open My jobs on your phone, choose the assigned visit, attach a completion photo, and select Mark job done. A photo is required for crew completion.
- Owner: review the photo, completion time, and employee on the job. To end an employee’s access, open Team and select Remove access.
Each employee uses their own account. Never share the owner’s password. Crew members see assigned work; billing and team administration remain owner-only.
Manage your crew →Plan the day with Dispatch
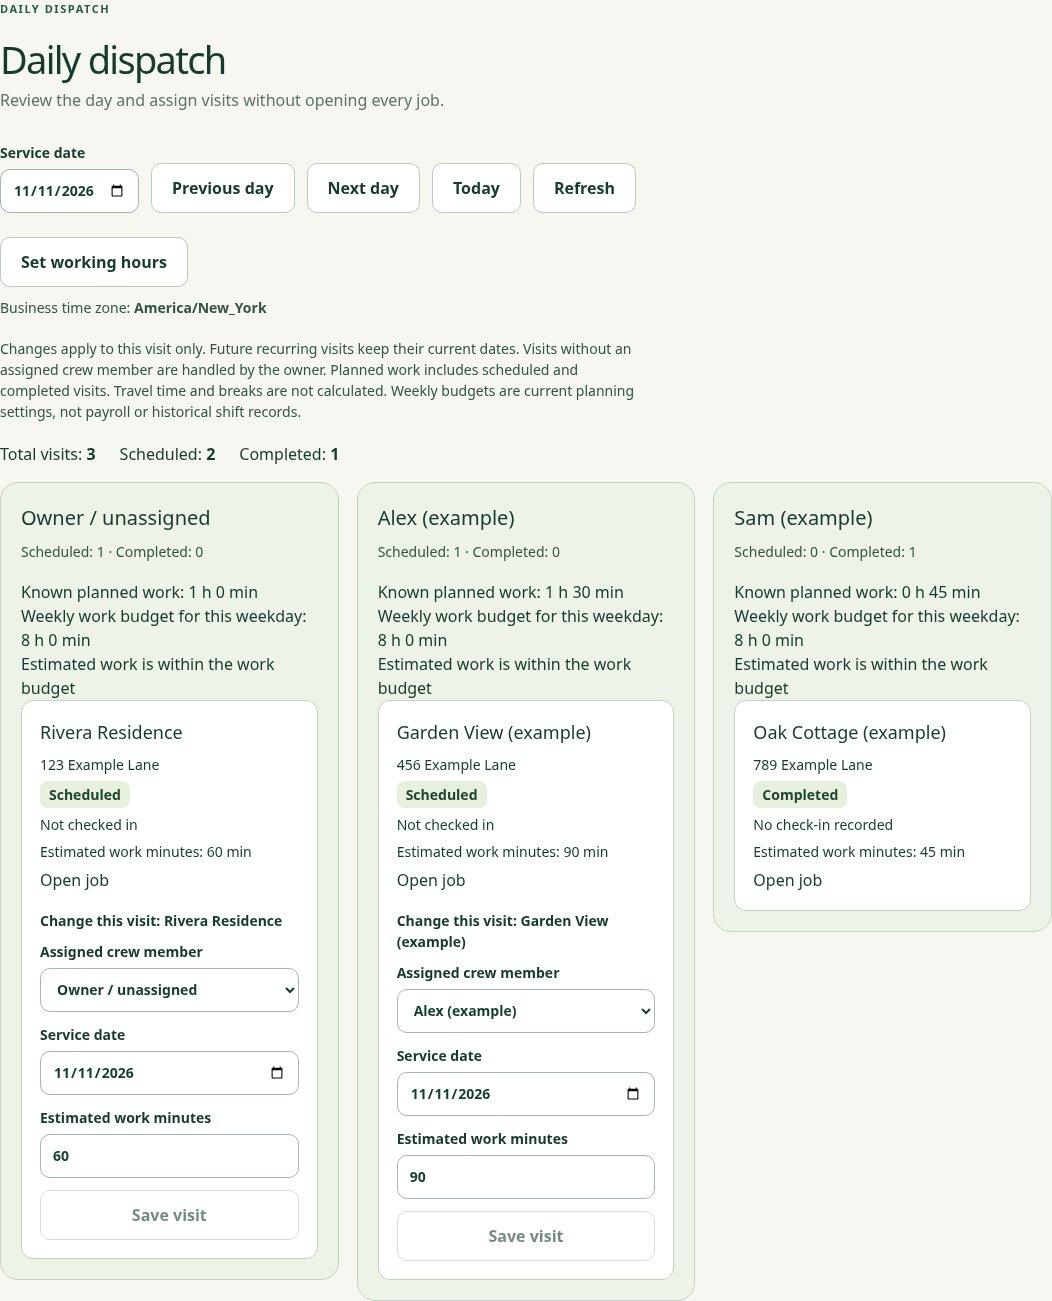
- Owner: open Dispatch and choose a date. Today follows the business time zone shown on the board, including when your phone uses another time zone.
- Review scheduled and completed job counts for each crew member. Owner / unassigned means the owner handles the visit until you assign it to an employee.
- For a scheduled visit, choose an active crew member or the owner, then select Save visit. Change the service date to move only this visit; future recurring visits stay unchanged.
- If the job changed while you were planning, refresh and review the latest details before trying again. An unfinished photo upload must be resolved from the job before changing its assignment or date.
- Completed visits are read-only. Affected crew receive job updates under their notification preferences and can acknowledge the latest update in MowFlow.
Counts show visits, not available work hours. Dispatch does not calculate crew capacity, appointment times or an optimized route.
Plan the daily route
- Owner: open Daily route from Dispatch, Schedule or the workspace menu. Load one active crew member and a business-local date. The owner lane contains unassigned visits. Up to 50 scheduled visits are included together.
- Set a starting point you can share with that crew. Review each service location once. Find address coordinates optionally sends only the address to the U.S. Census geocoder. Check every match and point in the map, or enter reviewed coordinates manually. A changed client address needs review again.
- Choose whether to return to the starting point and select a route calculation. Road distances and driving times, when available, supports up to 20 visits within 100 km (62 mi) of the starting point and sends only reviewed coordinates to Geoapify. Coordinate distances supports up to 50 visits and shows approximate straight-line miles, without driving time. Select Suggest stop order. You can move stops up or down or use the saved order, then preview the adjusted order again.
- Review road miles, estimated driving minutes and known work minutes when available. The work + driving total excludes breaks and live traffic; missing work estimates make it incomplete. The weekday work budget excludes driving and breaks. Switching calculation methods clears the preview. If road estimates fail, retry or explicitly choose Coordinate distances; there is no automatic fallback. Confirm the reviewed order and publish. Publication changes order only, sends no messages and does not move appointments or reassign jobs. If a response is lost, retry the same publication.
- Crew: open Daily route for the day, then open the next visit or its directions. Check in and complete it with a photo from the visit as usual. Refresh to see progress. Road estimates show when they were calculated and describe the full published route, not remaining travel. If assignments, dates, locations or the starting point change, the route needs owner review and publication again. Use My jobs for current assignments.
Set up many route locations
- Open Clients → Set up route locations, or use the bulk setup link on Daily route. Search and filter your clients. Reviewed locations are reused automatically on future days; a changed address needs review again.
- Select pending lookups on the current page and start Find selected addresses. Only selected service addresses go to the U.S. Census geocoder. The page handles short minute waits, shows progress and lets you pause. Daily limits pause until you resume later. Completed matches are stored so you can return without repeating them.
- Review the address and map points. Select single matches together or choose the right candidate for a client with several matches. Missing addresses and unmatched clients stay unresolved; use Edit client address or enter reviewed coordinates individually.
- Select the matches you checked, confirm the review checkbox and Save reviewed locations. Up to 50 locations save together. A stale address or location stops the whole selected save. Retry the same save after a lost response. This setup does not publish routes, change appointments or send messages.
See published daily routes
- Open Daily route → View daily routes. The initial range includes the previous seven days and the next 30 days. Choose a date range of up to 93 calendar days, filter by crew, or use Today. Pages show 20 routes, newest service date first.
- Owners see their workspace's published routes. Crew see only their own. Each card shows the latest publication, published stop count and current completed/scheduled counts. Road estimates, when present, show their calculation time and provider; coordinate routes keep their approximate straight-line label. Open a route to see its stops and next scheduled visit.
- Refresh for current completion updates. Reassigned, moved or cancelled stops are removed from the old crew's details. A changed route shows Needs review and provides no next-stop guidance until the owner reviews it. Former crew routes can be inspected by the owner, with no planner link for an inactive member.
- Owner: Open day in planner selects the route's exact date and active crew. Viewing the list and details does not publish, reorder, move or reassign work and sends no messages. Routes without a publication are not listed.